Location services play a crucial role in enhancing mobile functionality. Whether it is finding the nearest coffee shop, navigating through a new city, or going to a new destination, enabling location services is essential.
Location services are also the most important data concerning your privacy. We advise that you only give access to your location to applications you trust.
This guide will walk you through the process of enabling location services on both Android and iOS devices, and then find my present location.
Steps to Enable/Disable Location Services on Android Phones:
Step 1: Unlock Your Android Device and go to the Home screen.
Step 2: Locate and open the Settings app on your home screen or in the app drawer. It is represented by a gear-shaped icon ⚙️ in most Android phones.
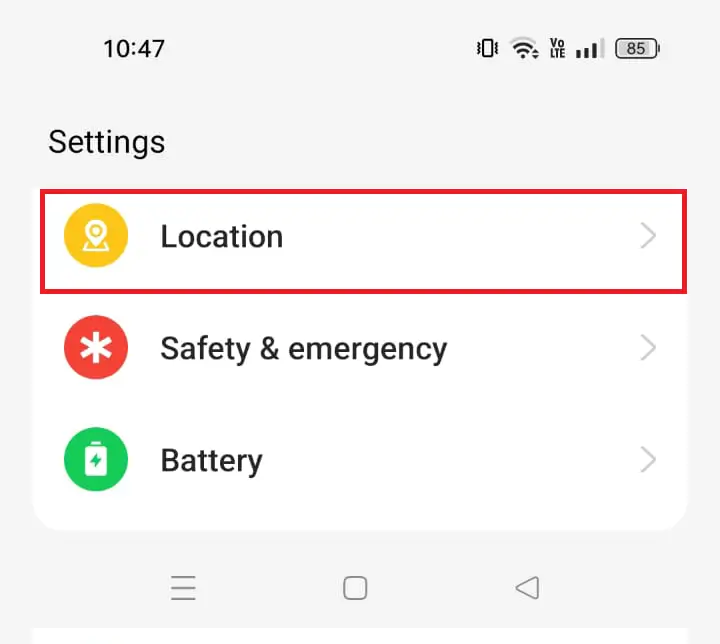
Step 3: Scroll down in the settings menu until you find the “Location” option. Tap on it to access the Location settings.
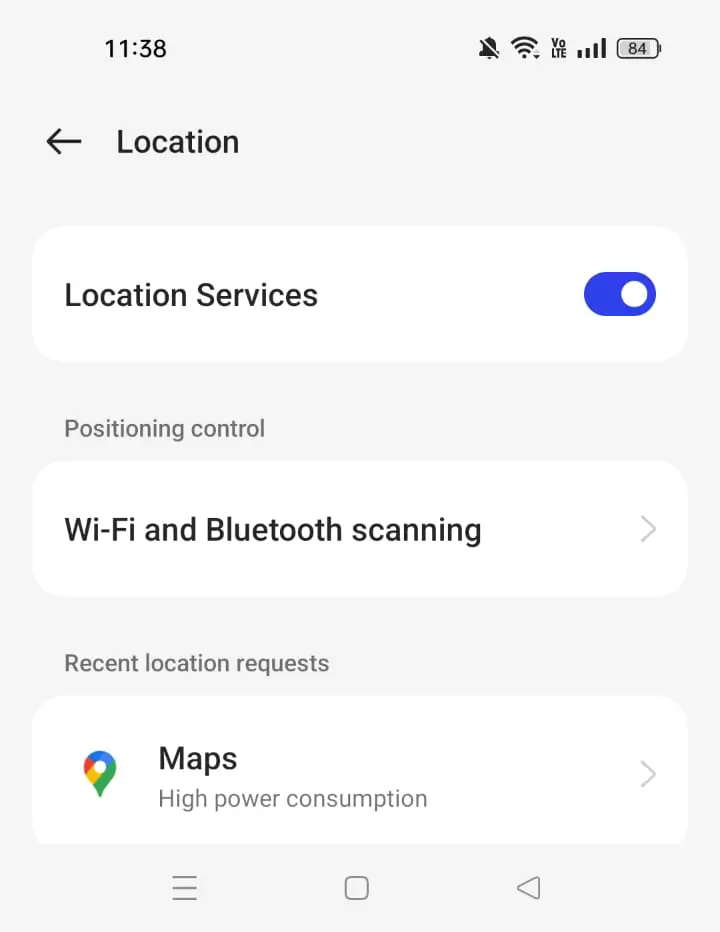
Step 4: You will find an ON/OFF toggle switch at the top of the screen. Tap the switch to enable location services. If the location services are already enabled, tapping on the toggle will disable the location services.
You may also find more information and settings related to location services if you scroll down. For example, apps that have recently used your location, and all applications that have access to your location.
You can also customize these settings, like adjusting the permissions for each app according to your preferences. This is especially important when a lot of random apps have access to your location.
We advise that you should remove access to your location for applications that either you don’t trust, or the apps that don’t necessarily need that information.
You can also choose location modes within the location settings. Options may include “Allowed all the time”, “Allowed only while in use”, “Ask every time”, or “Not allowed”. Select the mode that aligns with your requirements.
Congratulations! You have now successfully enabled (or disabled) location services on your Android phone.
Steps to Enable/Disable Location Services on Apple (or iOS) Phones:
Step 1: Unlock your iPhone or iPad and navigate to the home screen.
Step 2: Find the Settings app on your home screen – it’s represented by a gear icon ⚙️.
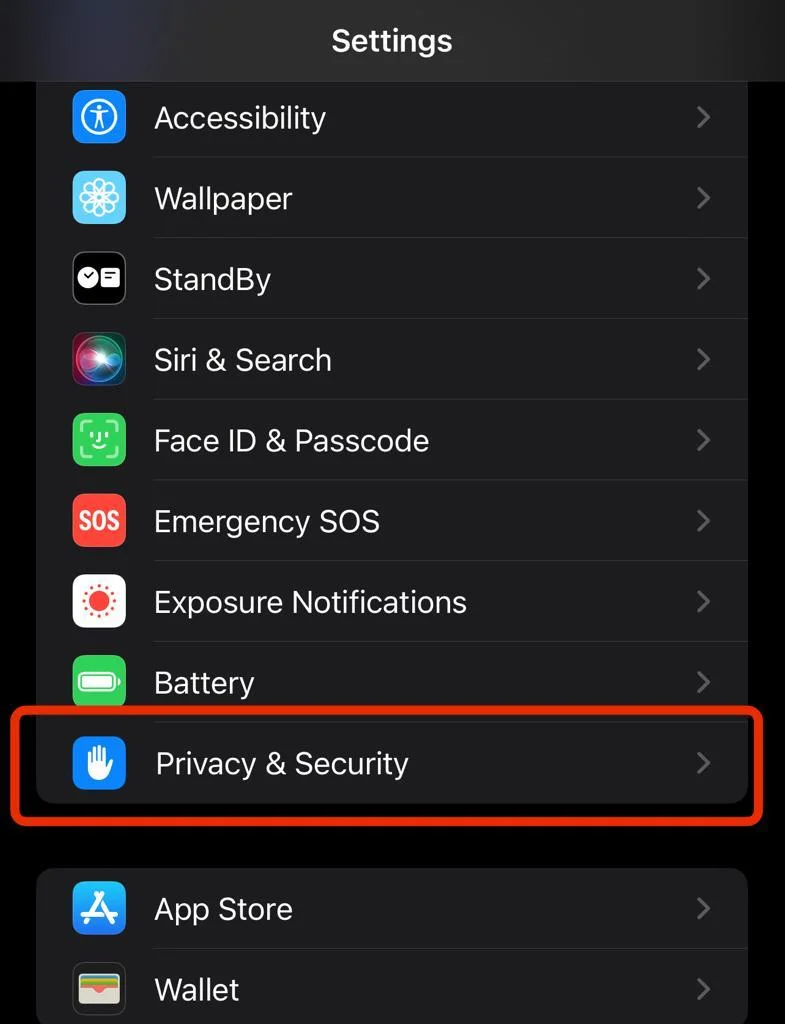
Step 3: In the Settings menu, scroll down and tap on “Privacy & Security”. You can also search for “privacy” in the search bar.
This is where you’ll find various privacy-related settings, including location services.
Step 4: Under the “Privacy & Security” menu, you will find “Location Services” on top of the menu. Tap on it to access the location settings.
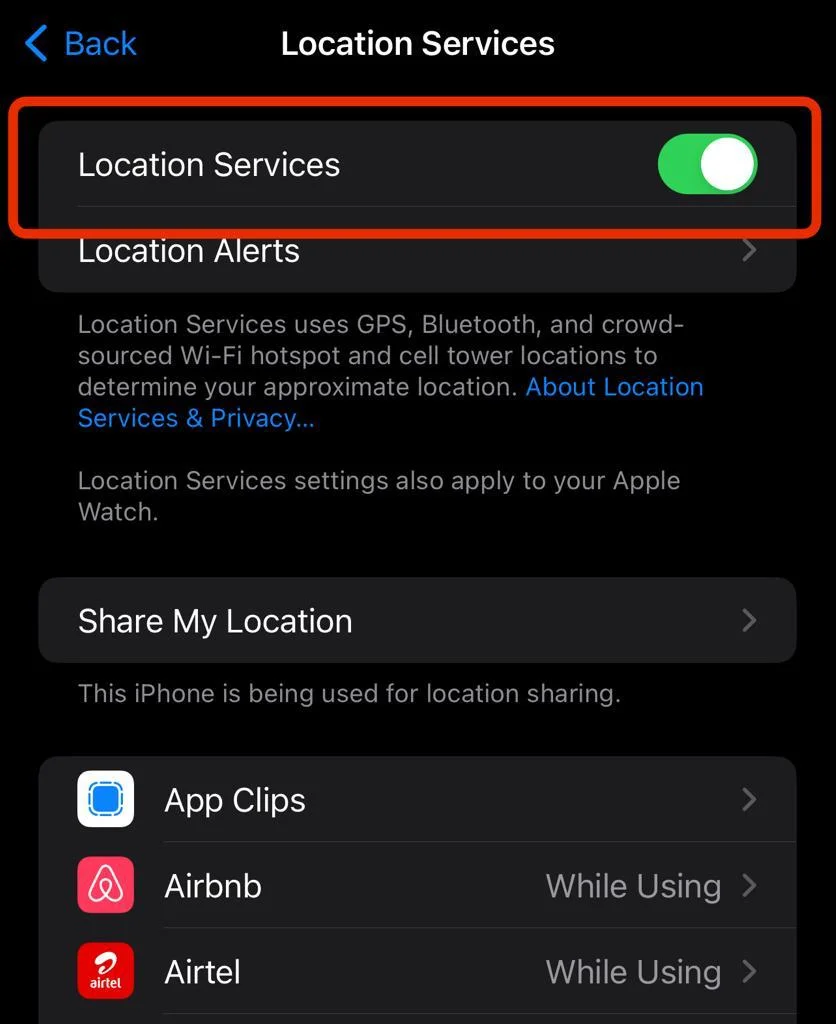
Step 5: To Turn On Location Services, tap on the toggle switch at the top of the “Location Services” screen to enable or disable location services for your device.
To configure app permissions, scroll down to view a list of installed apps with their location access. You can adjust the settings for each app according to your preference.
You will have three options for each app: “Never”, Ask Next Time or When I Share” or “While Using the App”.
As mentioned before, we advise that you should remove access to your location for applications that either you don’t trust, or the apps that don’t necessarily need that information.
You’ve now successfully enabled location services on your iOS device.
To Find My Current Location
Now that you have enabled your location services, you can easily find your current location using Google Maps.
Please Note: You may use any navigational app to find my current location. In this article, we have explained it using the example of Google Maps. The steps will be similar for another app.
Step 1: Unlock your phone and access the Home Screen.
Step 2: Open Google Maps. If you don’t have Google Maps, please download it from the Play Store or App Store respectively.
Step 3: Google Maps will ask for permission to access your location services. Accept those permissions.
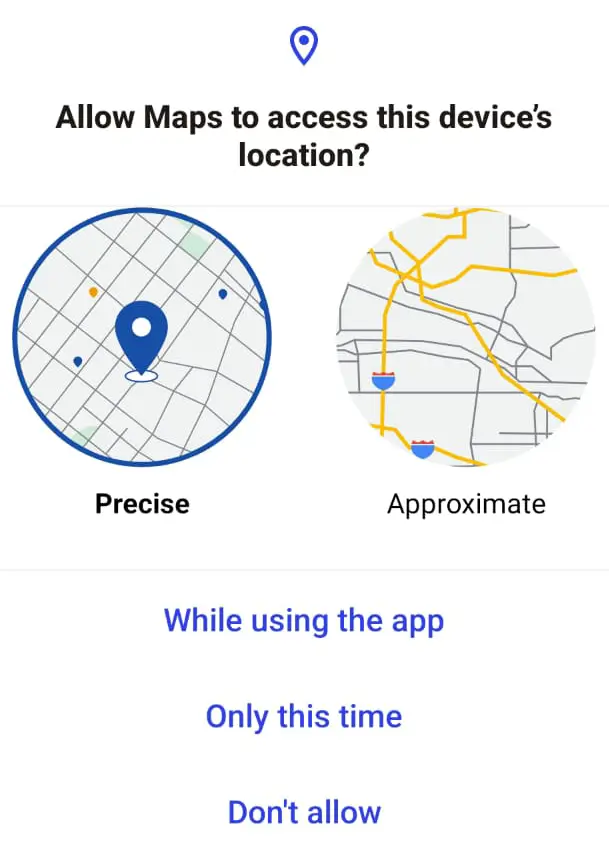
You can change these settings anytime by using the steps mentioned above.
Step 4: You will see a small arrow on the bottom-right of your screen. Tap on the arrow.
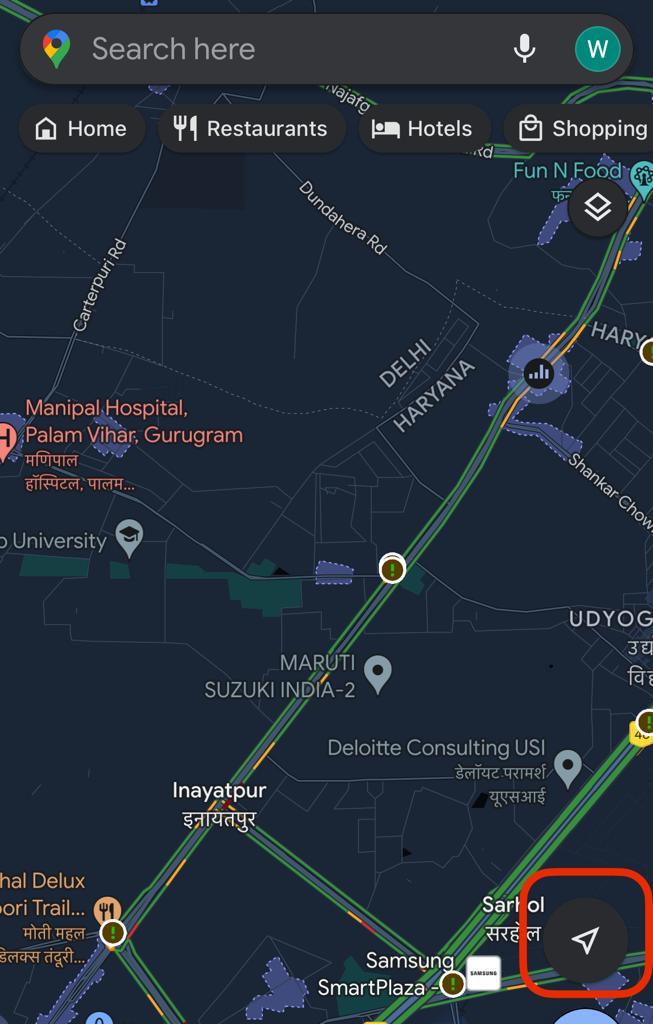
Step 5: You will see a “blue dot” on the map. That dot represents my present location.
You can zoom in or out to see things near your location.
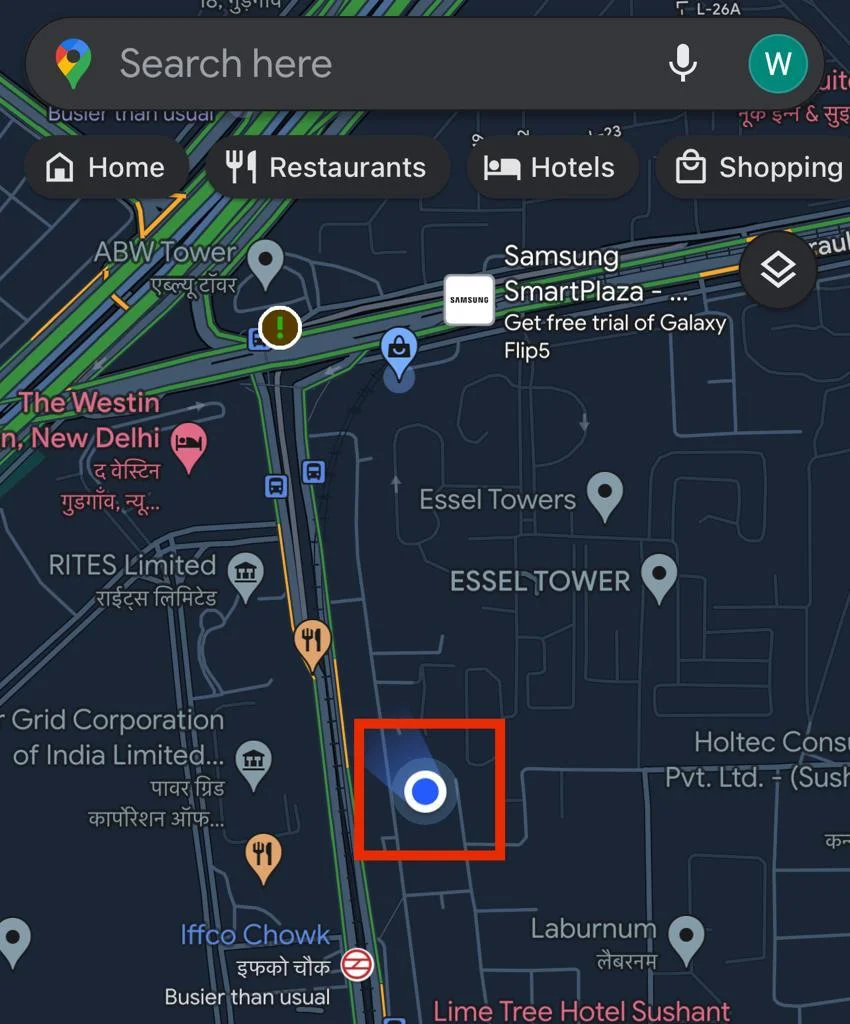
Now that you know my present location, you can use it for different things, like finding your pincode, route information, and more.
To know more about Finding the pincode of your current location, click here.
Conclusion
Enabling location services on your mobile phone enhances its capabilities and allows you to make the most of location-based features and services.
Whether you’re an Android or iOS user, following these step-by-step guides ensures that you can easily customize and control your device’s location settings to suit your preferences and needs.
What is My Current Location?
To find your current location you need to first enable location services on your phone. To enable them you can follow the steps in the article above.
After you enable your location services, you can use the Pincode Finder Tool to find your current location and other location information like your pincode, latitude and longitude, city, state and more.
Where is My Location?
To know your location, you can use the Pincode Finder Tool to find your location and other location information.
How to Send Location on WhatsApp?
Step 1: Open WhatsApp and go to the chat where you want to send location on WhatsApp.
Step 2: Click on the Plus Icon ➕ next to the chat box. It will open a few options.
Step 3: Click on the Location Icon 📍.
Step 4: You can now choose from the following:
1. Share Live Location: This will share your live location with that person for a certain period. Meaning, the person will be able to track your location even when you move to a new location.
2. Send Your Current Location: This will only share your current location. Your location will not be updated when you move to a new location.

